Jan 4, 2011

11 GTALK TIPS


As I am a Btech Computer science student, I hav to submit a mini project and for that purpose I selected the topic instant messenger and tried to create a better instant messenger... for that purpose I searched about the current messenger I am using that is Gtalk ( i am a google fan)  and studied a lot about it... And Interestingly I found these features ( in other words some trick)s which will really enhance your Gtalk chatting experience...


1. Use Gtalk in Your Mobile
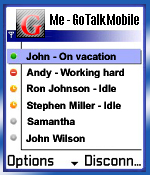
Do you know, you can even use Google talk in your mobile phone and stay connected with your friends on the go? The official Google software for chatting with your friends works with only iPhone and Android. There is another way to use Gtalk by use of SIS or JAR software for generic phones. You can download this J2ME client here. gotalkmobile
2. Exploit Keyboard Shortcuts to Save Time
Using keyboard shortcuts is the great way to maximize your productivity. You save your time by doing variety of functions without even touching mouse  just by pressing few buttons.
The following keyboard shortcuts are must for any Gtalk addict:

• Ctrl + E                – It centralizes the selected text, or the current line.
• Ctrl + R                – It justifies to the right the selected text, or the current line.
• Ctrl + L                – It justifies to the left the selected text, or the current line.
• Ctrl + I                 – The same thing does that Tab.
• Tab                       – It is giving the area to each of the windows opened by Google Talk.
• Ctrl + Tab             – The same thing does that Shift + Tab .
• Shift + Tab            – The same thing does that Tab but in reverse.
• Ctrl + Shift + L       -Switch between points, numbers, letters, capital letters, roman numbers and capital roman numbers
• Ctrl + 1 (KeyPad) – It does a simple space between the lines.
• Ctrl + 2 (KeyPad) – It does a double space between the lines.
• Ctrl + 5 (KeyPad)  – A space does 1.5 between the lines.
• Ctrl + 1 (NumPad) – It goes at the end of the last line.
• Ctrl + 7 (NumPad) – It goes at the begin of the last line.
• Ctrl + F4                – It closes the current window.
• Alt + F4                 – It closes the current window.
• Alt + Esc                – It Minimize all the windows.
• Windows + ESC   – Open Google Talk (if it’s minimized, or in the tray)
• F9                         – Open Gmail to send an email to the current contact.
• F11                       – It initiates a telephonic call with your friend.
• F12                        – It cancels a telephonic call.
• Esc                         – It closes the current window.

3. Hide your Gtalk Status – Make it Always Idle

We all love chatting. Google Talk gives us freedom to talk anywhere and anytime with our online friends. Message them instantaneously, transfer files, share photos – we love it all.
But what we don’t like is getting disturbed by some unwanted friend. We really don’t want to chat at that moment but we are forced for maintaining relations.
Can we trick Google Talk? Can we show idle status and be active at the same time?

The best way to keep unwanted friends away is to be invisible or keeping our status idle.Google talk has no provision of invisible status(however you can always choose invisible status in gmail embedded chat)

Idle status in gtalk means you aren’t using the feature for last 15 minutes.Being idle is more advantageous than it may seem. You can always make excuses to your colleagues. Didn’t you saw the idle status – I was having lunch, I was watching movie, – I was not in my chair, – My brother was playing some stupid game etc.
So far as many people know, you can’t make your status idle. Its an automatic update which ticks after 15 minutes of inactivity.
gAlwaysIdle is a small application which gets integrated with gtalk and forcibly sets your status to idle.
gAlwaysIdle
gAlwaysIdle is solution for your dilemma. Now chat with whom you initiate and remain idle to all others.4. Dress Your Gtalk Application with Additional Themes
Are you bored using the same white Gtalk every day? Now, you can dress your Gtalk application with custom and downloadable themes to add a little spice to boring Gtalk. You can download Gtalk themes from various sources such as 
gtalk theme


5. Create your own Gtalk theme
Google talk uses an Jabber protocol, a free open source protocol for communication. Since its open source, all its services are free and customizable. You can even view the code and API provided by Google.
In this tutorial, I will tell you to make your own custom theme for Google Talk.

Let us start with the Gtalk appearance customization:

1) Searching for Google Talk themes:

Copy and paste the above location in the My Computer address bar.
Press Enter and you will see the default location for themes.
2) Create a new folder and name it gtricks.
3) Let us choose theme ClassicPicture because of its simplicity. Go inside the folder ClassicPicture and you will find another folder named Contents. Copy it.
4) Navigate back to gtricks folder. Paste the Contents folder inside gtricks folder.
5) You will discover folder named Resources inside Contents. And inside Resources you will find few more files like main.css, status.html and others.
So your file structure should look like this :
….Google\Google Talk\themes\system\chat\gtricks\Contents\Resources
Next is providing your own background image:
6) Choose a image of size 300×250 which will act as theme background.
(Preferably a lighter color image). Name it aery.jpg .
7) Create a folder inside Resources folder and name it Images.
8) Put image Aery.jpg inside the folder Images.
So resultant cutomized backgroung will be
gtricks -> Contents -> Resources -> Images -> Aery.jpg
9) Navigate back to Resources folder and you will find main.css which specifies the style of theme.
10) Double click to open it and try to locate this code:

BODY {
margin: 6px;
}
11) Add background-image: url(“Images/Aery.jpg”); to above BODY class.
now it should look like :

BODY
{
margin: 6px;
background-image: url(“Images/Aery.jpg”);
}
Save it.
12) You are done for the first part. Close Gtalk from the system tray and restart. Go to settings and them appearance to select theme.
If you are familiar with CSS then you can continue editing main.css to modify fonts, colors, text alignments etc.
Here are the file descriptions that might help you :
main.css : This is the main CSS sheet in which you specify the class of styles as you do for HTML.
NextStatus.html : When you chat to someone, their changes in status will use the format specified in this file.
Status.html : When you chat to someone, their status will use the format specified in this file.
Incoming \ Content.html : When you chat to someone, their first reply will use the format specified in this file.
Incoming \ NextContent.html : When you chat to someone, their subsequent replies will use the format specified in this file.
Outgoing \ Content.html : When you chat to someone, your first message will use the format specified in this file.
Outgoing \ NextContent.html : When you chat to someone, your subsequent messages will use the format specified in this file

6. Make Your Chatting More Interesting by Text Decorations
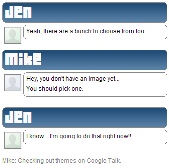
Most instant messengers are very user friendly. They have a toolbar to format your text into different fonts, colors and sizes. You can also convert your important text into bold, italicized or underlined. Google talk provides some basic features but unexpectedly few things are hidden.


To type your message in bold, encapsulate it in asterisks (*) 
To italicize any word, write it between two underscores (_). 
Use combination of asterisk(*) and underscore(_) to create a dual bold italicized effect
This feature can be used in both google talk and Gmail embedded chat


7. Have Two or More Gtalk Running at Same Time.
If you have two or more Google accounts, and want to use both at same time for chatting with friends, then this is the perfect trick for you. With this trick, you can run multiple copies of Google Talk application in you Windows.
All you need to do is to right click on Google talk shortcut and select Properties. In the target field append the parameter /nomutex so that it becomes like C:/Program Files/Google/Google Talk.exe /nomutex. It’s done. Now whenever you double click on Google Talk Desktop icon, it opens a new instance for a new Google account.

8. Use Gtalk Bots to Make Your Life Easier
Google bots are automated robots that respond to your queries. For example, or the news bot will fetch you latest news on your preferred subject inside Gtalk window and the translation bot automatically converts the text to the specified language you have send. Following are few Gtalk bots to make life easier :
1) Transliteration Bots.
2) IBN News bot.
3) GK Answering bot.
(Add webtoim@gmail.com to contact list in Gtalk or Gmail chat module  Now, type your question to this newly added friend for quick answer. Type help for assistance and menu for details)

4) Listen Online Radio with this bot.
Add service@gtalk2voip.com as your friend in your IM. Example: Add/Invite to chat on Gtalk.
Now type help in the chat window and you will get list of available commands.Type radio to get list of available live statioNS. Now type radio number in chat window of the selected online station. Example “radio 101”.Finally, accept the call from gtalk2voip to listen to online streaming radio.


9. Amaze Your Friends with Hidden and Secret Set of Emoticons/Smileys
emoticons
Here’s a list of utterly new emoticons/smileys:
Classic
Round
Square
Type this

Cowbell

Cowbell

Cowbell
+/’\

Crab

Crab

Crab
V.v.V

Devil

Devil

Devil
}:-)

Equal sad

Equal sad

Equal sad
=(

Equal slant

Equal slant

Equal slant
=/

Equal tongue

Equal tongue

Equal tongue
=P

Nose sad

Nose sad

Nose sad
:-(

Smile

Smile

Smile
:)

Wince

Wince

Wince
>.<

Nose tongue

Nose tongue

Nose tongue
:-P

Pig
Pig

Pig
:(:)

Broken Heart

Broken Heart

Broken Heart

Kiss

Kiss

Kiss
:-x

Kiss

Kiss

Kiss
:*

Mustache

Mustache

Mustache
:{

.

Classic
Round
Square
Type this

Heart/Love

Heart/Love

Heart/Love
<3

It’s a monkey!

It’s a monkey!

It’s a monkey!
:(|)

Rock out.

Rock out.

Rock out.
\m/

Shocked

Shocked

Shocked
:-o

Grin

Grin

Grin
:D

Frown

Frown

Frown
:(

Angry

Angry

Angry
x-(

Cool

Cool

Cool
B-)

Cry

Cry

Cry
:’(

Equal Grin

Equal Grin

Equal Grin
=D

Wink

Wink

Wink
;)

Straight Face

Straight Face

Straight Face
:-|

Equal Smile

Equal Smile

Equal Smile
=)

Nose Grin

Nose Grin

Nose Grin
:-D

Big nose wink

Big nose wink

Big nose wink
;^)

Nose wink

Nose wink

Nose wink
;-)

Nose smile

Nose smile

Nose smile
:-)

Slant

Slant

Slant
:-/

Tongue

Tongue

Tongue
:P


Remember that these secret emoticons works for only following flavors of gtalk:
1) Google talk gadget
2) Gmail integrated chat application
3) Google talk labs edition

10. Direct Shortcut to Chat
If you frequently chat with particular friends in Gtalk, then you can create direct shortcuts to chat window to start conversation. This is the quickest and direct way to start a chat with friend.
For this, right click on your desktop and select New > Shortcut. Now add the following line in the location of the item :
gtalk:chat?jid=username@gmail.com
Where username@gmail should be replaced by your friends gmail address.

11. Use Google Talk without Downloading and Installing
You can use and enjoy all the features of Google talk without even downloading and installing it on your computer. For this bookmark http://talkgadget.google.com/talkgadget/popout in your internet browser. Using this bookmark, you can directly launch Google talk in gadget mode.

Oct 9, 2010

THE WINDOWS 7 REGISTRY


 The Registry is a central repository Windows 7 uses to store anything and everything that applies to the configuration of your system. This includes all the following:


  • . Information about all the hardware installed on your
  • computer
  • . The resources those devices use
  • . A list of the device drivers that Windows 7 loads at
  • startup
  • . Settings that Windows 7 uses internally
  • . File type data that associates a particular type of file
  • with a specific application
  • . Backgrounds, color schemes, and other interface
  • customization settings
  • . Other customization settings for things such as the Start menu and the taskbar
  • . Internet and network connections and passwords
  • . Settings for Windows 7 applications such as Windows Explorer and Internet Explorer
  • . Settings and customization options for many third-party applications


It’s all stored in one central location, and, thanks to a handy tool called the Registry Editor, it’s yours to play with (carefully!)


To launch the Registry Editor, select Start, type regedit into the Search box, and then press Enter. When the User Account Control dialog box shows up, enter your credentials to continue.

CAUTION
The Registry Editor is arguably the most dangerous tool in the Windows 7 arsenal. The
Registry is so crucial to the smooth functioning of Windows 7 that a single imprudent
change to a Registry entry can bring your system to its knees. Therefore, now that you
have the Registry Editor open, don’t start tweaking settings willy-nilly. Instead, read the
section titled “Keeping the Registry Safe,” later in this chapter, for some advice on pro-
tecting this precious and sensitive resource
Getting to Know the Registry

The Registry may be a dangerous tool, but you can mitigate that danger somewhat by becoming familiar with the layout of the Registry and what it various bits and parts are used for. This will help you avoid sensitive areas and stick to those Registry neighborhoods where it’s safe to poke around.

Navigating the Keys Pane
The Registry Editor is reminiscent of Windows Explorer, and it works in sort of the same way. The left side of the Registry Editor window is similar to Explorer’s Folders pane, except that rather than folders, you see keys. For lack of a better phrase, I’ll call the left pane the Keys pane.


Understanding Registry Settings
If the left side of the Registry Editor window is analogous to Explorer’s Folders pane, the right side is analogous to Explorer’s Contents pane. In this case, the right side of the Registry Editor window displays the settings contained in each key (so I’ll call it the Settings pane). The Settings pane is divided into three columns:
. Name—This column tells you the name of each setting in the currently selected key 
                (analogous to a filename in Explorer).
. Type—This column tells you the data type of the setting. There are six possible
             data types:
REG_SZ—This is a string value.
REG_MULTI_SZ—This is a series of strings.
REG_EXPAND_SZ—This is a string value that contains an environment variable name that
gets “expanded” into the value of that variable. For example, thE %SystemRoot% environment variable holds the folder in which Windows 7 was installed. So, if you see a RegistrY setting with the value %SystemRoot%\System32\, and Windows 7 is installed in C:\Windows, the setting’s expanded value is C:\Windows\System32\.
 REG_DWORD—This is a double word value: a 32-bit hexadecimal value arranged as eight
digits. For example, 11 hex is 17 decimal, so this number would be represente in DWORD form as 0x00000011 (17). (Why “double word”? A 32-bit value represents four bytes of data, and because a word in programming circles is defined as two bytes, a fouRbyte Value is a double word.)
REG_QWORD—This is a quadruple word value: a 64-bit hexadecimal value arranged as 16
digits. Note that leading zeros are suppressed for the high 8 digits. Therefore, 11 hex229 Getting to Know the Registry appears as 0x00000011 (17), and 100000000 hex appears as 0x1000000000(4294967296).
REG_BINARY—This value is a series of hexadecimal digits.
. Data—This column displays the value of each setting.

Getting to Know the Registry’s Root Keys
The root keys are your Registry starting points, so you need to become familiar with what
kinds of data each key holds. The next few sections summarize the contents of each key.
HKEY_CLASSES_ROOT
HKEY_CLASSES_ROOT—usually abbreviated as HKCR—contains data related to file extensions
and their associated programs, the objects that exist in the Windows 7 system, as well as
applications and their automation information. There are also keys related to shortcuts
and other interface features.
The top part of this key contains subkeys for various file extensions. You see .bmp for
bitmap (Paint) files, .txt for text (Notepad) files, and so on. In each of these subkeys, the
Default setting tells you the name of the registered file type associated with the exten-
sion. (I discussed file types in more detail in Chapter 3, “Customizing the File System.”)
For example, the .txt extension is associated with the txtfile file type.

These registered file types appear as subkeys later in the HKEY_CLASSES_ROOT branch, and
the Registry keeps track of various settings for each registered file type. In particular, the
shell subkey tells you the actions associated with this file type. For example, in the
shell\open\command subkey, the Default setting shows the path for the executable file
that opens.
HKEY_CLASSES_ROOT is actually a copy (or an alias, as these copied keys are called) of the
following HKEY_LOCAL_MACHINE key:
HKEY_LOCAL_MACHINE\Software\Classes
The Registry creates an alias for HKEY_CLASSES_ROOT to make these keys easier for applica-
tions to access and to improve compatibility with legacy programs.

HKEY_CURRENT_USER
HKEY_CURRENT_USER—usually abbreviated as HKCU—contains data that applies to the user
that’s currently logged on. It contains user-specific settings for Control Panel options,
network connections, applications, and more. Note that if a user has group policies set on
his account, his settings are stored in the HKEY_USERS\sid subkey (where sid is the user’s
security ID). When that user logs on, these settings are copied to HKEY_CURRENT_USER. For
all other users, HKEY_CURRENT_USER is built from the user’s profile file, ntuser.dat (located
in %UserProfile%).
Here’s a summary of the most important HKEY_CURRENT_USER subkeys:
AppEvents           Contains sound files that play when particular system events occur
                            (such as maximizing of a window)

Control Panel       Contains settings related to certain Control Panel icons
                             
Keyboard               Layout Contains the keyboard layout as selected via Control Panel’S Keyboard icon

Network                 Contains settings related to mapped network drives

Software                Contains user-specific settings related to installed applications and
                               Windows
HKEY_USERS
HKEY_USERS (HKU) contains settings that are similar to those in HKEY_CURRENT_USER.
HKEY_USERS is used to store the settings for users with group policies defined, as well as the
default settings (in the .DEFAULT subkey) which get mapped to a new user’s profile.

HKEY_CURRENT_CONFIG
HKEY_CURRENT_CONFIG (HKCC) contains settings for the current hardware profile. If your
machine uses only one hardware profile, HKEY_CURRENT_CONFIG is an alias for
HKEY_LOCAL_MACHINE\SYSTEM\ControlSet001. If your machine uses multiple hardware
profiles, HKEY_CURRENT_CONFIG is an alias for HKEY_LOCAL_MACHINE\SYSTEM\ControlSetnnn,
where nnn is the numeric identifier of the current hardware profile. This identifier is given
by the CurrentConfig setting in the following key:
HKLM\SYSTEM\CurrentControlSet\Control\IDConfigDB

Sep 7, 2010

HACKING GMAIL USING GX SCRIPT


Introduction


Hacking web application was always curious for the script kiddies. And hacking free web email account is every geek first attempt. The method which I will describe in this post is not new; the same method can be applied to yahoo and other free web email services too.

The method we will be using is cookie stealing and replaying the same back to the Gmail server. There are many ways you can steal cookie, one of them is XSS (Cross site scripting). But we won’t be using any XSS here, in our part of attack we will use some local tool to steal cookie and use that cookie to get an access to Gmail account.

Assumption:
You are in Local Area Network (LAN) in a switched / wireless environment : example : office , cyber café, Mall etc.
You know basic networking.

Tool used for this attack:
Cain & Abel
Network Miner
Firefox web browser with Cookie Editor add-ons

Attack in detail:

We assume you are connected to LAN/Wireless network. Our main goal is to capture Gmail GX cookie from the network. We can only capture cookie when someone is actually using his gmail. I’ve noticed normally in lunch time in office, or during shift start people normally check their emails. If you are in cyber café or in Mall then there are more chances of catching people using Gmail.

We will go step by step,
If you are using Wireless network then you can skip this Step A.

A] Using Cain to do ARP poisoning and routing:

Switch allows unicast traffic mainly to pass through its ports. When X and Y are communicating eachother in switch network then Z will not come to know what X & Y are communicating, so inorder to sniff that communication you would have to poison ARP table of switch for X & Y. In Wireless you don’t have to do poisoning because Wireless Access points act like HUB which forwards any communication to all its ports (recipients).
Start Cain from Start > Program > Cain > Cain
Click on Start/Stop Snigger tool icon from the tool bar, we will first scan the network to see what all IPs are used in the network and this list will also help us to launch an attack on the victim.
Then click on Sniffer Tab then Host Tab below. Right click within that spreadsheet and click on Scan Mac Addresses, from the Target section select
All hosts in my subnet and then press Ok. This will list all host connected in your network. You will notice you won’t see your Physical IP of your machine in that list.
How to check your physical IP ?
> Click on start > Run type cmd and press enter, in the command prompt type
Ipconfig and enter. This should show your IP address assign to your PC.
It will have following outputs:


Main thing to know here is your IP address and your Default Gateway.

Make a note of your IP Address & default gateway. From Cain you will see list of IP addresses, here you have to choose any free IP address which is not used anywhere. We assume IP 192.168.1.10 is not used anywhere in the network.

Click on Configure > APR > Use Spoof ed IP and MAC Address > IP
Type in 192.168.1.10 and from the poisoning section click on “Use ARP request Packets” and click on OK.

Within the Sniffer Tab , below click on APR Tab, from the left hand side click on APR and now click on the right hand top spreadsheet then click on plus sign tool from top. The moment you click that it will show you list of IP address on left hand side. Here we will target the victim IP address and the default gateway.

The purpose is to do ARP poisoning between victim and the default gateway and route the victim traffic via your machine. From the left side click on Victim IP address, we assume victim is using 192.168.1.15. The moment you click on victim IP you will see remaining list on the right hand side here you have to select default gateway IP address i.e. 192.168.1.1 then click on OK.
Finally, Click on Start/Stop Sniffer tool menu once again and next click on Start/Stop APR. This will start poisoning victim and default gateway.

B] Using Network Miner to capture cookie in plain text


We are using Network miner to capture cookie, but Network miner can be used for manythings from capturing text , image, HTTP parameters, files. Network Miner is normally used in Passive reconnaissance to collect IP, domain and OS finger print of the connected device to your machine. If you don’t have Network miner you can use any other sniffer available like Wireshark, Iris network scanner, NetWitness etc.

We are using This tool because of its ease to use.

Open Network Miner by clicking its exe (pls note it requires .Net framework to work).
From the “---Select network adaptor in the list---“ click on down arrow and select your adaptor If you are using Ethernet wired network then your adaptor would have Ethernet name and IP address of your machine and if you are using wireless then adaptor name would contain wireless and your IP address. Select the one which you are using and click on start.
Important thing before you start this make sure you are not browsing any websites, or using any Instant Mesaging and you have cleared all cookies from firefox.
Click on Credential Tab above. This tab will capture all HTTP cookies , pay a close look on “Host” column you should see somewhere mail.google.com. If you could locate mail.google.com entry then in the same entry right click at Username column and click on “copy username” then open notepad and paste the copied content there.
Remove word wrap from notepad and search for GX in the line. Cookie which you have captured will contain many cookies from gmail each would be separated by semicolon ( GX cookie will start with GX= and will end with semicolon you would have to copy everything between = and semicolon
Example : GX= axcvb1mzdwkfefv ; ßcopy only axcvb1mzdwkfefv

Now we have captured GX cookie its time now to use this cookie and replay the attack and log in to victim email id, for this we will use firefox and cookie editor add-ons.

C] Using Firefox & cookie Editor to replay attack.


Open Firefox and log in your gmail email account.
from firefox click on Tools > cookie Editor.
In the filter box type .google.com and Press Filter and from below list search for cookiename GX. If you locate GX then double click on that GX cookie and then from content box delete everything and paste your captured GX cookie from stepB.4 and click on save and then close.
From the Address bar of Firefox type mail.google.com and press enter, this should replay victim GX cookie to Gmail server and you would get logged in to victim Gmail email account.
Sorry! You can’t change password with cookie attack.

How to be saved from this kind of attack?


Google has provided a way out for this attack where you can use secure cookie instead of unsecure cookie. You can enable secure cookie option to always use https from Gmail settings. 
Settings > Browser connection > Always use https


------

pop3.