Showing posts with label ubuntu. Show all posts

Dec 9, 2011

How to change GRUB settings in Ubuntu

I am really happy to introduce a fanpage of LETHALTRIX in facebook. I recommend all of you to follow LethalTrix in facebook, so that u will be updated about the new posts. Also this fanpage is made to make Lethaltrix more Interactive. You can post any of your doubts about Ubuntu ,Hacking or Computer Tips and I will try my level best to help you and post about in LethalTrix... 

 So this post is dedicated to our friend Renitto who inaugurated the fanpage by asking about Grub..Thank u dude for the response u have shown..
 
Actually GRUB is the short form for GRand Unified Bootloader.It is a boot loader package from the GNU project. GRUB  provides the user the choice to boot one of multiple operating systems installed on a computer.

 Grub Customizer is a great software used in Ubuntu or other Debian versions of Linux such as Linuxmint to make changes to grub.You can change the appearance of the GRUB, make changes to the boot list, add, rename or delete a new entry, insert background image, change colour and so on...

Inorder to install Grub customizer you have 3 ways.

INSTALLATION USING TERMINAL
U can access Terminal by pressing the short key Alt+Ctrl+ T. Now type the following commands in order.
Code:
sudo add-apt-repository ppa:danielrichter2007/grub-customizer
sudo apt-get update
sudo apt-get install grub-customizer

I prefer this method as it is the fastest method to install. But if you hate terminal view  and if you feel it geeky ,you can go for the other options.

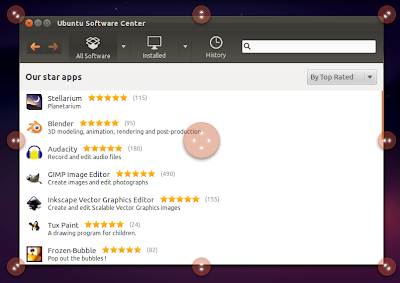
INSTALLATION USING SOFTWARE MANAGER

Open Software centre
  • Add the repository
    Edit > Software Sources > Other Software > Add
    Type: ppa:danielrichter2007/grub-customizer > Add Source > Close
    Reload
  • Install Grub Customizer
    Highlight "Get Software" in the left panel.
    In the upper right search window, type "Grub Customizer".
    Double-click "Grub Customizer" and click the 'Install' icon.

INSTALLATION USING SYNAPTIC

Synaptic:
  • Start Synaptic
    System > Administration > Synaptic Package Manager (IN UBUNTU 10.10 & earlier versions)
  • Add the repository
    Settings tab > Repositories > Other Software > Add
    Type: ppa:danielrichter2007/grub-customizer > Add Source > Close
    Reload
  • Install Grub Customizer
    'Quick-search' > type "grub-customizer" > Select "grub-customizer" in lower panel.
    Apply.


4. Making Changes (from Main Page)


  • Removing / Hiding Entries
    • Hide An Entire Section: Untick the main header (linux, os-prober, etc)
      • Example: Unticking os-prober will disable the script and remove all entries normally found by it - Windows, other Ubuntu installations, etc. Even if the entries within the subsection are enabled, they will not be displayed.
      • Hide Specific Entries: Untick the entry
        • Example: Unticking Ubuntu, with 2.6.35-24-generic will remove that specific entry in the Grub 2 menu.
  • Freezing Entries (new Entries)
    • Unticking "new Entries" prevents the addition of any new Grub 2 menu entries for that section. New options found during updates may be included in the tree view but will not be selected by default.
      • If a new item is found by an enabled script, it will not be added to the Grub 2 menu.
    • Example: If 'new Entries' in 'linux' is deselected, when a new kernel is installed on the main system it will not appear in the menu.
  • Adding Entries
    • Tick the applicable entry.
    • Selecting a main category will enable the script.
    • Selecting an item within a main category will add it to the Grub 2 menu if it's parent is enabled.
  • Renaming Entries
    • Double-click a menu title to enable the editing mode. Type the new title and click elsewhere on the page to complete the edit.
  • Moving Entries
    • To move a main section, highlight the entry and use the Up/Dn arrows on the main menu to change the menu order. Moving a main category will move all its submenus.
      • Example: If you want Windows to appear before the main Ubuntu entries, move os-prober to the top of the list.
    • To move a title up or down within a subsection, highlight the entry and use the Up/Dn arrows on the main menu to change the menu order.
      • A titles can only be moved within its own subsection.

5. Preferences Tabs (Edit > Preferences)
  • General

    Initial display options such as whether the menu is shown, which menu entry is highlighted, and what kernel options to add to the instructions.
    • Default entry
      • How to Specify the Default Entry by Name:
        • 'default entry' > 'predefined': Click on "Entry 1", on the expanded selection screen choose the exact title from the right column.
        • This works for Grub 1.98. Grub 1.99/Natty introduces submenus and using exact titles will change. I don't know if GC has accounted for this change yet. In the meantime, you can refer to this link on how to manually add a default entry from a submenu:
    • visibility - Menu display, other OS selections, and timeout.
    • kernel parameters - Add options such as nomodeset, noapic, quiet, splash, etc
  • Appearance

                             
    Menu eye candy - resolutions, colors, background images.
    • custom resolution
    • menu colors
    • background image
  • Advanced

    Selection of options normally found in the /etc/default/grub file. The user can enable/disable individual items and can modify the existing entries by double-clicking the 'value' column and entering the desired value.

    • The only items listed in this section are those which currently exist in /etc/default/grub. The user can enable items displayed here, but cannot add items which do not already exist in the file.
    • Ticked items are included in the Grub 2 configuration file.
    • Unticked items will not be included in the Grub 2 configuration file. Unticking an entry places a # (comment) symbol at the start of the line in /etc/default/grub

   Returning to Grub 2 Defaults

 Original files which Grub Customizer will modify are moved to the /etc/grub.d/proxifiedScripts folder, with the leading numeric designation removed.

The /etc/grub.d/proxifiedScripts and /etc/grub.d/bin folders, and any *_proxy files are only created if a Grub 2 script has to be modified. If only changes normally made to /etc/default/grub are invoked by Grub Customizer, the following won't be necessary.

To restore the normal Grub 2 control of the boot menu:
  • Remove the /etc/grub.d/bin folder
  • Move the contents of /etc/grub.d/proxifiedScritps back to the /etc/grub.d folder.
    • Any files moved back need to be renamed to the original name.
    • linux back to 10_linux, os-prober back to 30_os-prober, etc.
  • Remove the /etc/grub.d/proxifiedScipts folder once it is empty.
  • Check the settings in /etc/default/grub and make any desired changes (default kernel, timeout, etc).
  • Run "sudo update-grub".


This software is a wonderful tool to edit Grub... If you want more good themes and beautiful themes for your GRUB ,I suggest you go with Burg, an alternative for GRUB...


Oct 26, 2011

WELCOME UBUNTU 11.10 "ONERIC OCELOT'


Hai friends... I was not in touch with this blog for last few weeks since my university exams were going on... Lots of interesting things have happened on this small  duration and one of the most important in this is the release of Ubuntu 11.10 the  'Oneric Ocelot'.
I have been using Oneric from their 2nd alpha release and found many things superb in this release...
  One of the greatest change we first notice while going with ubuntu 11.10 is its new look for the login screen.(LightDM is the new login screen while the old one is GDM).. I loved the new look and made my first impression the best ... Congrats for Ubuntu for that.I hope most of the users have the same experience. :)

 The next thing we will notice in new ubuntu is that it doesnot have Ubuntu classic, instead it provides unity 2D interface. As my laptop is old , Ubuntu unity is little lagging hence I went on with unity 2D and I am surprised that its also cool as Unity.. Wow!!.

  So what are the things I have done done after Installing Ubuntu 11.10 in my computer.Thats what I would like share through this post.. Thanks to Techdrivein.com for an explained list of what all we have to do.. First of all we have to update the repositories and make sure all the updates are installed... Otherwise many of the interesting features in Ubuntu wont work.

UPDATE REPOSITORY

For that type update manager in unity dash and select it. click check and install all the updates.. Done (We can also do this alternatively by typing the following command in terminal which can be accessed using the shortcut key Alt+ctrl+T. 
sudo apt-get update && sudo apt-get upgrade
 

UBUNTU RESTRICTED PACKAGES  

After that Install Ubuntu -Restricted packages. Otherwise You wont be able to listen to music or watch movies.. One method is to click a mp3 or videofile and Ubuntu will show the missing packages and just update it from it. Now the other more efficient way is to go to terminal and type
sudo apt-get install ubuntu-restricted-extras 

Or if you dont like command interface (if it feels like geeky) dont worry...Ubuntu provides you an alternate way. take synaptic package manager (search in unity dash) and type ubuntu-restricted-extras, click on the box on the left side and click mark for installation and apply from the top panel.. Done

Enable Full DVD Playback(Dual Layer DVD Support)

Installing Ubuntu -Restricted packages package will pull in support for MP3 playback and decoding,support for various other audio formats (GStreamer plugins), Microsoft fonts,Java runtime environment, Flash plugin, LAME (to create compressed audio
files), and DVD playback.But this does not install libdvdcss2, and will not let you play
encrypted DVDs such as Dual Layer DVDs.


 sudo wget --output-document=/etc/apt/sources.list.d/medibuntu.list http://www.medibuntu.org/sources.list.d/$(lsb_release -cs).list && sudo apt-get --quiet update && sudo apt-get --yes --quiet --allow-unauthenticated install medibuntu-keyring && sudo apt-get --quiet update
sudo apt-get install libdvdcss2
 You can also install this using Synaptic package manager. But U have to update your source list. For that take settings -> Repositories-> other software. But i prefer you use the Terminal method which is more easy.. Sometimes Geeky methods are more easier than that of grapphical interface.

Check for Availability of Proprietary Hardware Drivers
 Now you have to download the drivers for the graphic card, wireless LAN , bluetooth etc on the system...Most properly drivers for this will be available in Additional Drivers which can be accessed from unity dash board.. Update all the drivers in the list.. Sometimes drivers for your system  may not be available in Additional Drivers. In such cases I am sorry to inform that you have to swim deeply inside ubuntuforums which almost solve any problems related to ubuntu...

(image from techdrive.in)


  Install Compiz Config Settings Manager

Compiz brings the beautification effects for your desktop and is a very good tool to surprise your friends who are new to Ubuntu.. This compiz package has helped me to make my friends use  Linux...If you never used Compiz, its better you try out its magic..
To install this, just search compiz config manager in Ubuntu software centre..
Also install all compiz plugin extra and compiz fusion plugin extra packages using synaptic package manager. You can also install Coompiz config settings manager using terminal by

sudo apt-get install compizconfig-settings-manager

You can get compiz config settings manager by seaching CCSM in unity dashboard.Just experiment on it.

  •        You can increase/decrease the size of launcher icons in the unity plugin-> experimental tab in ccsm
  • you can also change the transparency of unity panel in unity plugin-> experimental
  • You can increase the number of dektops by general options-> desktop size in ccsm
  •   You can give animations to opening and closing windows, menus, popup menus etc from animations under effects in ccsm
Also try the water effect, wobly effect.. i effects menu.

Add Your Favorite Places as Quicklists for Home Icon in Unity

  • Copy 'Home Folder' launcher file to your home directory. For that, you need to open Terminal(Unity Shortcut: Ctrl + Alt + T) and copy-paste the following commands.
cp /usr/share/applications/nautilus-home.desktop ~/.local/share/applications
  • Open the file in your favorite text editor. I am using vi editor here.
sudo vi  ~/.local/share/applications/nautilus-home.desktop
  • Now replace the content of the file with the following text.
[Desktop Entry]

Name=Home Folder
Comment=Open your personal folder
TryExec=nautilus
Exec=nautilus --no-desktop
Icon=user-home
Terminal=false
StartupNotify=true
Type=Application
Categories=GNOME;GTK;Core;
OnlyShowIn=GNOME;Unity;
X-GNOME-Bugzilla-Bugzilla=GNOME
X-GNOME-Bugzilla-Product=nautilus
X-GNOME-Bugzilla-Component=general
X-Ubuntu-Gettext-Domain=nautilus

X-Ayatana-Desktop-Shortcuts=Videos;Documents;Music;Pictures;Downloads
[Videos Shortcut Group]
Name=Videos
Exec=nautilus Videos
TargetEnvironment=Unity


[Documents Shortcut Group]
Name=Documents
Exec=nautilus Documents
TargetEnvironment=Unity

[Music Shortcut Group]
Name=Music
Exec=nautilus Music
TargetEnvironment=Unity

[Pictures Shortcut Group]
Name=Pictures
Exec=nautilus Pictures
TargetEnvironment=Unity

[Downloads Shortcut Group]
Name=Downloads
Exec=nautilus Downloads
TargetEnvironment=Unity
  • And restart Unity. Hit Alt + F2 and run the following command to restart Unity.
unity --replace
  • Done. If that doesn't work, you might need to log out and log back in to restart Unity. 

Enable Unity Grab Handles

Unity grab handles are a easy and eyecandy way of resizing windows, better suited for touch screen devices though.
  • Launch CCSM(just search for CCSM in Unity Dash).
Howto Enable Unity Grab Handles
  • Make sure that the category Png(highlighted above) is ticked.
Howto Enable Unity Grab Handles
  • In the Uncategorized section at the bottom of CCSM, make sure that Unity MT Grab Handles is ticked as well. Click on Unity MT Grab Handles option now.
Howto turn on Unity Grab Handles
  • You will see that the Toggle Handles option is Disabled by default. Click on the Disabled button and tick the resulting Enabled box.
Howto Enable Unity Grab Handles
  • Hit Grab key combination button and select the shortcut you want. As you can see in the screenshot above, Control + Alt + g was my choice. Its up to you.
Unity Grab Handles Ubuntu
  • Done. Unity Grab Handles are enabled in Ubuntu 11.10 successfully.

SYSAPPLICATIONS ON THE UNITY TOP PANEL


U would have noticed that Unity Top panel is locked down so that U cant add any more applications in that..

  • weather application
type the following in the terminal
sudo apt-get install indicator-weather


  • Dropbox application Indicator
how to install : http://www.techdrivein.com/2010/09/how-to-install-dropbox-in-ubuntu-lucid.html

  • Sysmonitor Indicator
 Paste the following in Terminal
sudo add-apt-repository ppa:alexeftimie/ppa
sudo apt-get update
sudo apt-get install indicator-sysmonitor

  • System Load Indicator
Do the following in Terminal to install System Load Indicator
sudo add-apt-repository ppa:indicator-multiload/stable-daily
sudo apt-get update
sudo apt-get install indicator-multiload
Done. And simply launch System Load Indicator from Unity dash. Eventhough System Load Indicator app is equally good, I prefer Sysmonitor Indicator for its simplicity.
  • Touchpad Indicator
sudo add-apt-repository ppa:atareao/atareao
sudo apt-get update
sudo apt-get install touchpad-indicator
Done. Now, once you disable your touchpad, you can access top panel by simply hitting F10 key.

  • Work Space indicator


sudo add-apt-repository ppa:geod/ppa-geod
sudo apt-get update
sudo apt-get install indicator-workspaces


  • Keylock Application Indicator

sudo add-apt-repository ppa:tsbarnes/indicator-keylock
sudo apt-get update
sudo apt-get install indicator-keylock


  • Caffeine Application Indicator

Caffeine Application Indicator Ubuntu 11.04
Caffeine is a very useful application application that can temporarily prevent the activation of both the screensaver and the "sleep" powersaving mode. There is even an option to activate Caffeine when specific applications are launched. Do the following in Terminal to install Caffeine in Ubuntu 11.04.
sudo add-apt-repository ppa:caffeine-developers/ppa
sudo apt-get update
sudo apt-get install caffeine
Done. Simply launch Caffeine from Unity dash.


  •  Pastie Clipboard Manager Indicator


Best Application Indicators Ubuntu 11.04
Pastie is a simple clipboard manager. Do the following in Terminal to install Pasite indicator in Ubuntu 11.04 Natty Narwhal.
sudo add-apt-repository ppa:hel-sheep/pastie
sudo apt-get update
sudo apt-get install pastie
Done. Launch Pastie clipboard manager from Unity applications dash.

 Install GNOME Shell in Ubuntu

gnome shell in ubuntu 11.10

Just search for 'GNOME Shell' in Software Center OR do the following in Terminal.

sudo apt-get install gnome-shell

Aug 27, 2011

Repair Windows From Within Ubuntu..

Many of us are now prefering Dual boot of both Windows 7 and Ubuntu.. And many times we may come to situations when Windows is refusing to boot. I have encountered many situations like both in my laptop and my friends.. First thing we have to do in such a situation is not to be panicked. And this is one of the methods I found whie searching a solution for that...
                         You can try repairing the windows file system from within the UBuntu (whatever may be the reason for windows to refuse to boot). For this you must have a package called ntfsprogs. For that use Synaptic package manager (system->administration->synaptictic package manager in ubuntu 10.10 or just search in UNity search in ubuntu 11.4).
          
               Once its installed,
  • unmount your windows partition if it is mounted. 
  • type sudo ntfsfix /dev/sda1 (type the actual windows partion instead of /dev/sda1. It can be obtained from disk utility )

THis method is also useful when you see the "Cannot mount volume error when attempting to access your windows partition from within Ubuntu.


Jun 22, 2011

Installation of Ubuntu...

Many of us are unaware off installing Ubuntu alongside other operating systems such as Windows 7... So I thought my experience of installing Ubuntu in various computers of my friends will be helpful for my readers. First of all ,let me answer the question that everyone who is new to Linux asks.. Why should I install Ubuntu along with Windows? What is more in Ubuntu than Windows..?In my view , Linux is a platform where you can play without fearing licence. U r a free bird in Linux environment..U can make any changes to ur OS.actually it will be your Own OS... U control what U do... Almost everything is reversible in Linux.. and you get a good support from ubuntu forums.So that even if you entered in any dilemas, there is always a solution other than formatting...

   Now to the main part of this post..Installing Ubuntu..(Other Linux OS are similar to this type of installation..So it will be nice if u experiment with other OS suvh as linuxmint, pinguy,etc).. There are two types of installation of Ubuntu with Windows 7.
Install inside Windows (wubi)
install in other partition..

In wubi, Ubuntu is installed inside windows..that is just like installing a software.. U dont need to know partitioning and all.. just insert ubuntu  disk, choose install inside windows. set username and password, Select boot point as / and install...so easy.. Now when you reboot ubuntu will be there in windows bootloader.. 

  but wubi had shown some problems in my experience.. I dont know the actual reason for that.. the ubuntu option may get removed from bootloader so that u cannot access ubuntu. But thi problem has been seen only in few..

  So inorder to install along wiith windows. Insert ubuntu disk and boot with CDRom.(Press f12,f2 or whatever it says at the time of booting and boot from cdrom) now, I prefer partition manually using GParted which is there in system->administration of Ubuntu live. In GParted, You can see the current partitions in your computer. 
                                         There are two types of partition.. Primary partition and logical partition.. Only 4 primary partitions can be made.. Inorder to make more than 4 partition you have to make one of them logical partition and then create extended partitions from that logical partitions. Any number of logical partitions can be made.
   Now select a partition that have larger size and right click on it and select resize. In the window that comes 15GB free ( i prefer 15 GB but U can allocate as much as u like from 10GB) you will have to mention the size in MB. and click ok. right click on that and choose format. select ext 4 journal file system. and press apply (green tick marl on the top). Otherwise it will just show as partitioned but not actually done.After thet again click on the largest partition and then resize. this time U are creating Linux swap.. To install linux you should have swap partition.Swap is just like temp. If there is not enough space in primary RAM ,computer takes space from linux swap.. Linux swap should be minimum size of your RAM otherwise you cant get the option to hibernate your system. If there i only 1 or gb ram and if you hav 320 gb harddisk, It is advisable to take double the size of RAM as swap.Otherwise swap as much as of RAM is necessary... To create swap, right click the resized partition ,and format. select SWAP from the file system. click apply tick mark. Now partitioning is over. Now click on install ubuntu icon on the desktop. choose setup manually. Select the ext4 filesystem. click format. Set / as mount point and forward... read the instructions and continue the rest...
  Installation is completed...

                                    KNOWN ISSUES
In dell laptops, a software called datasafe online rewrites the GRUB of ubuntu so that if u restart the system after working on windows , GRUB (where you select which operating system will be missing). For this the solution is insert live disk of Ubuntu ,mount the drive you installed ubuntu (by clicking that drive in places). Now take terminal and reinstall the grub..(https://help.ubuntu.com/community/RecoveringUbuntuAfterInstallingWindows) and boot into the windows .now remove della datasafe from windows using adfd or remove programs in control panel.. And restart the system.. if there is no grub insert live cd and install GRUB once again.

May 25, 2011

Important thing to note when switching from WINDOWS to UBUNTU..


Recently UBUNTU has gained much popularity among college students and others than the past... Many are willing to try UBUNTU who had been get used to with WINDOWS. Actually I am such a person, and took some time to get tuned with UBUNTU... So this post is for all migrators to UBUNTU from WINDOWS .
    Just keep in mind some things and U will find Ubuntu lot more interesting..

.EXE Files in windows and packages in UBUNTU
                   Windows software comes in .exe files, which you are expected to get from the web or from a store. Ubuntu software comes in packages, which are installed and updated through a centralised system, like a more powerful version of Windows Update and Add/Remove Programs. Application packages will usually appear in the Applicationsmenu, configuration tools will usually appear in the Preferences orAdministration menu.In the same way that Windows only runs software designed for Windows, applications must be made for Linux to be able to run on Ubuntu. Most Linux software is available for free over the Internet.


Firewalls and antivirus software


Ubuntu's main firewall program is called ufw (click here to install gufw). There are currently very few Linux viruses in the wild, so Ubuntu doesn't come with antivirus software installed.


The Terminal

Linux includes a text-based interface like cmd.exe, called the terminal. Many Linux guides ask you to run commands in the terminal, which should be available from Applications > Accessories > Terminal


Task Manager

Ubuntu's System Monitor is the closest equivalent to the Task Manager in Windows. It's available through System > Administration > System Monitor.


Where To Put Your Files

Linux doesn't use drive letters, so there's no C: drive and no D: drive. You'll get used to Linux's filesystem gradually, but for now here are the most important locations:
/home/
This is your home folder, which is fairly similar to My Documents in Windows. You can access this folder by clicking PlacesHome Folder. Because this folder is used so often, many programs refer to it as "$HOME" or "~" ("tilde", pronounced "till-der". For example, saving a file as ~/my-file.txt is the same as saving it as /home//my-file.txt
/home
This is folder contains everybody's home folders, and is fairly similar to Documents and Settings in Windows. The main thing to remember is that despite the name, this is not your home folder. If somebody tells you to go to your home folder, they mean /home/.
/media
This folder contains CD-ROMs, memory sticks, and other removable media. Individual drives will also appear in the Places menu item and on your desktop.
/tmp
This folder contains temporary files, and is cleaned out when you reboot.


Safely removing drives

When you are finished with a removable drive, right click on the drive's desktop icon and select Unmount volume or Eject, depending on what type of drive it is.


Dual-Boot

When you are looking to switch to Ubuntu one option that may make the transition a little easier is setting up a dual-boot. In a dual-boot, during the boot process, a menu will appear, allowing you to choose from one of two OS's. This allows you to try out Ubuntu while keeping your Windows installation.


Traditional

In a traditional dual-boot Windows will be installed along side of Ubuntu each having it's own partition. If Windows is already installed, this option does pose some risk. To enable each OS to have it's own partition you will need to edit the partition which has the risk of data loss.

Wubi

If you are not ready for this, another option would be Wubi. Wubi is a special installation that will install Ubuntu within Windows similar to any other program. When installing Wubi, you specify how much of the hard drive to devote to Wubi. Not changing the partitions removes the risk of data loss.

                                                                                        SOURCE : www.help.ubuntu.com 

May 22, 2011

How to retain ur Old scroll Bar in Ubuntu 11.4

I started to use ubuntu from maverick meerkat version.. I was really excited with the desktop enhancement features of ubuntu and I became a open source fan... I actually shifted completely to ubuntu . The more I worked on Linux, more I started to love it.. I was eagerly waiting for the 11.4 ,the natty narhwall version of Ubuntu, and upgraded my ubuntu to 11.4 on the first day of release itself..But alas.. it had dissappointed me a lot.. MIssing of my my favourite effects on compiz (which made the ubuntu desktop really wonderful on maverick meerkat ) and the irritating small scroll bar... I was on a search in Internet to make the the natty narhwall version more comfortable..

     And I thought I would share my reults of with u.. In this post, I will share the method to return to ur old good looking scroll bar than that small irritating line and side buttoned scroll bar.. I think there are many who dont like the new scrollbar on ubuntu....
        
Select Applications then the Ubuntu Software Centre. If you have this problem in a different version of Linux, select the Synaptic package manager.
Search for overlay. The first list contains nothing of use. Go down to the bottom of the list and select the Display 64 technical items link. Now you have three Scrollbar overlay entries at the top of the list.
The first result is titled Scrollbar overlayed widget with a package name of overlay-scrollbar. Select the Remove button. This will remove the first two entries.
The third result is titled Scrollbar overlayed widget - shared lib. Select the Remove button. When this step is complete, your scrollbars should return to normal.